Getting started
Set up your workspace
Configure the first response path in an existing workspace and trigger a test incident.
A WarnFire workspace is your team’s private home. It holds your people, on-call configuration, services, and incidents. Workspace data is isolated from other WarnFire customers.
This page walks an authorized workspace administrator through a complete paging path and a test incident.
Before you begin
You need an organization-provisioned WarnFire workspace and tenant-owner or tenant-administrator access. Ask the workspace owner to add you if you do not already have access. Keep a secret manager ready for the integration key; WarnFire displays a new key only once.
Set up your first response path
- Sign in to the WarnFire console with the credentials supplied by your organization.
- Open the first-run setup form titled Page the right person in minutes.
- Complete the responder, schedule, escalation-policy, and service fields described below.
- Select Create response path →.
The form asks three questions:
- Who should receive the first page? Enter a name and email. This person is your first responder — someone who can be alerted when things break. If you use the workspace owner’s email, the same person has paging and console access. A different email creates a paging-only person; an owner must grant that person a console role before they can sign in to the mobile app.
- When are they on call? Give the schedule a name, pick the local timezone, and choose the handoff time. The default is a weekly rotation. With one member, that responder remains continuously on call; the boundary becomes relevant after you add more members.
- What should raise an incident? Name the escalation policy and the service you’re protecting, for example Primary escalation and Production website.
Press Create response path →. WarnFire creates everything at once — if any part fails, nothing half-finished is saved.
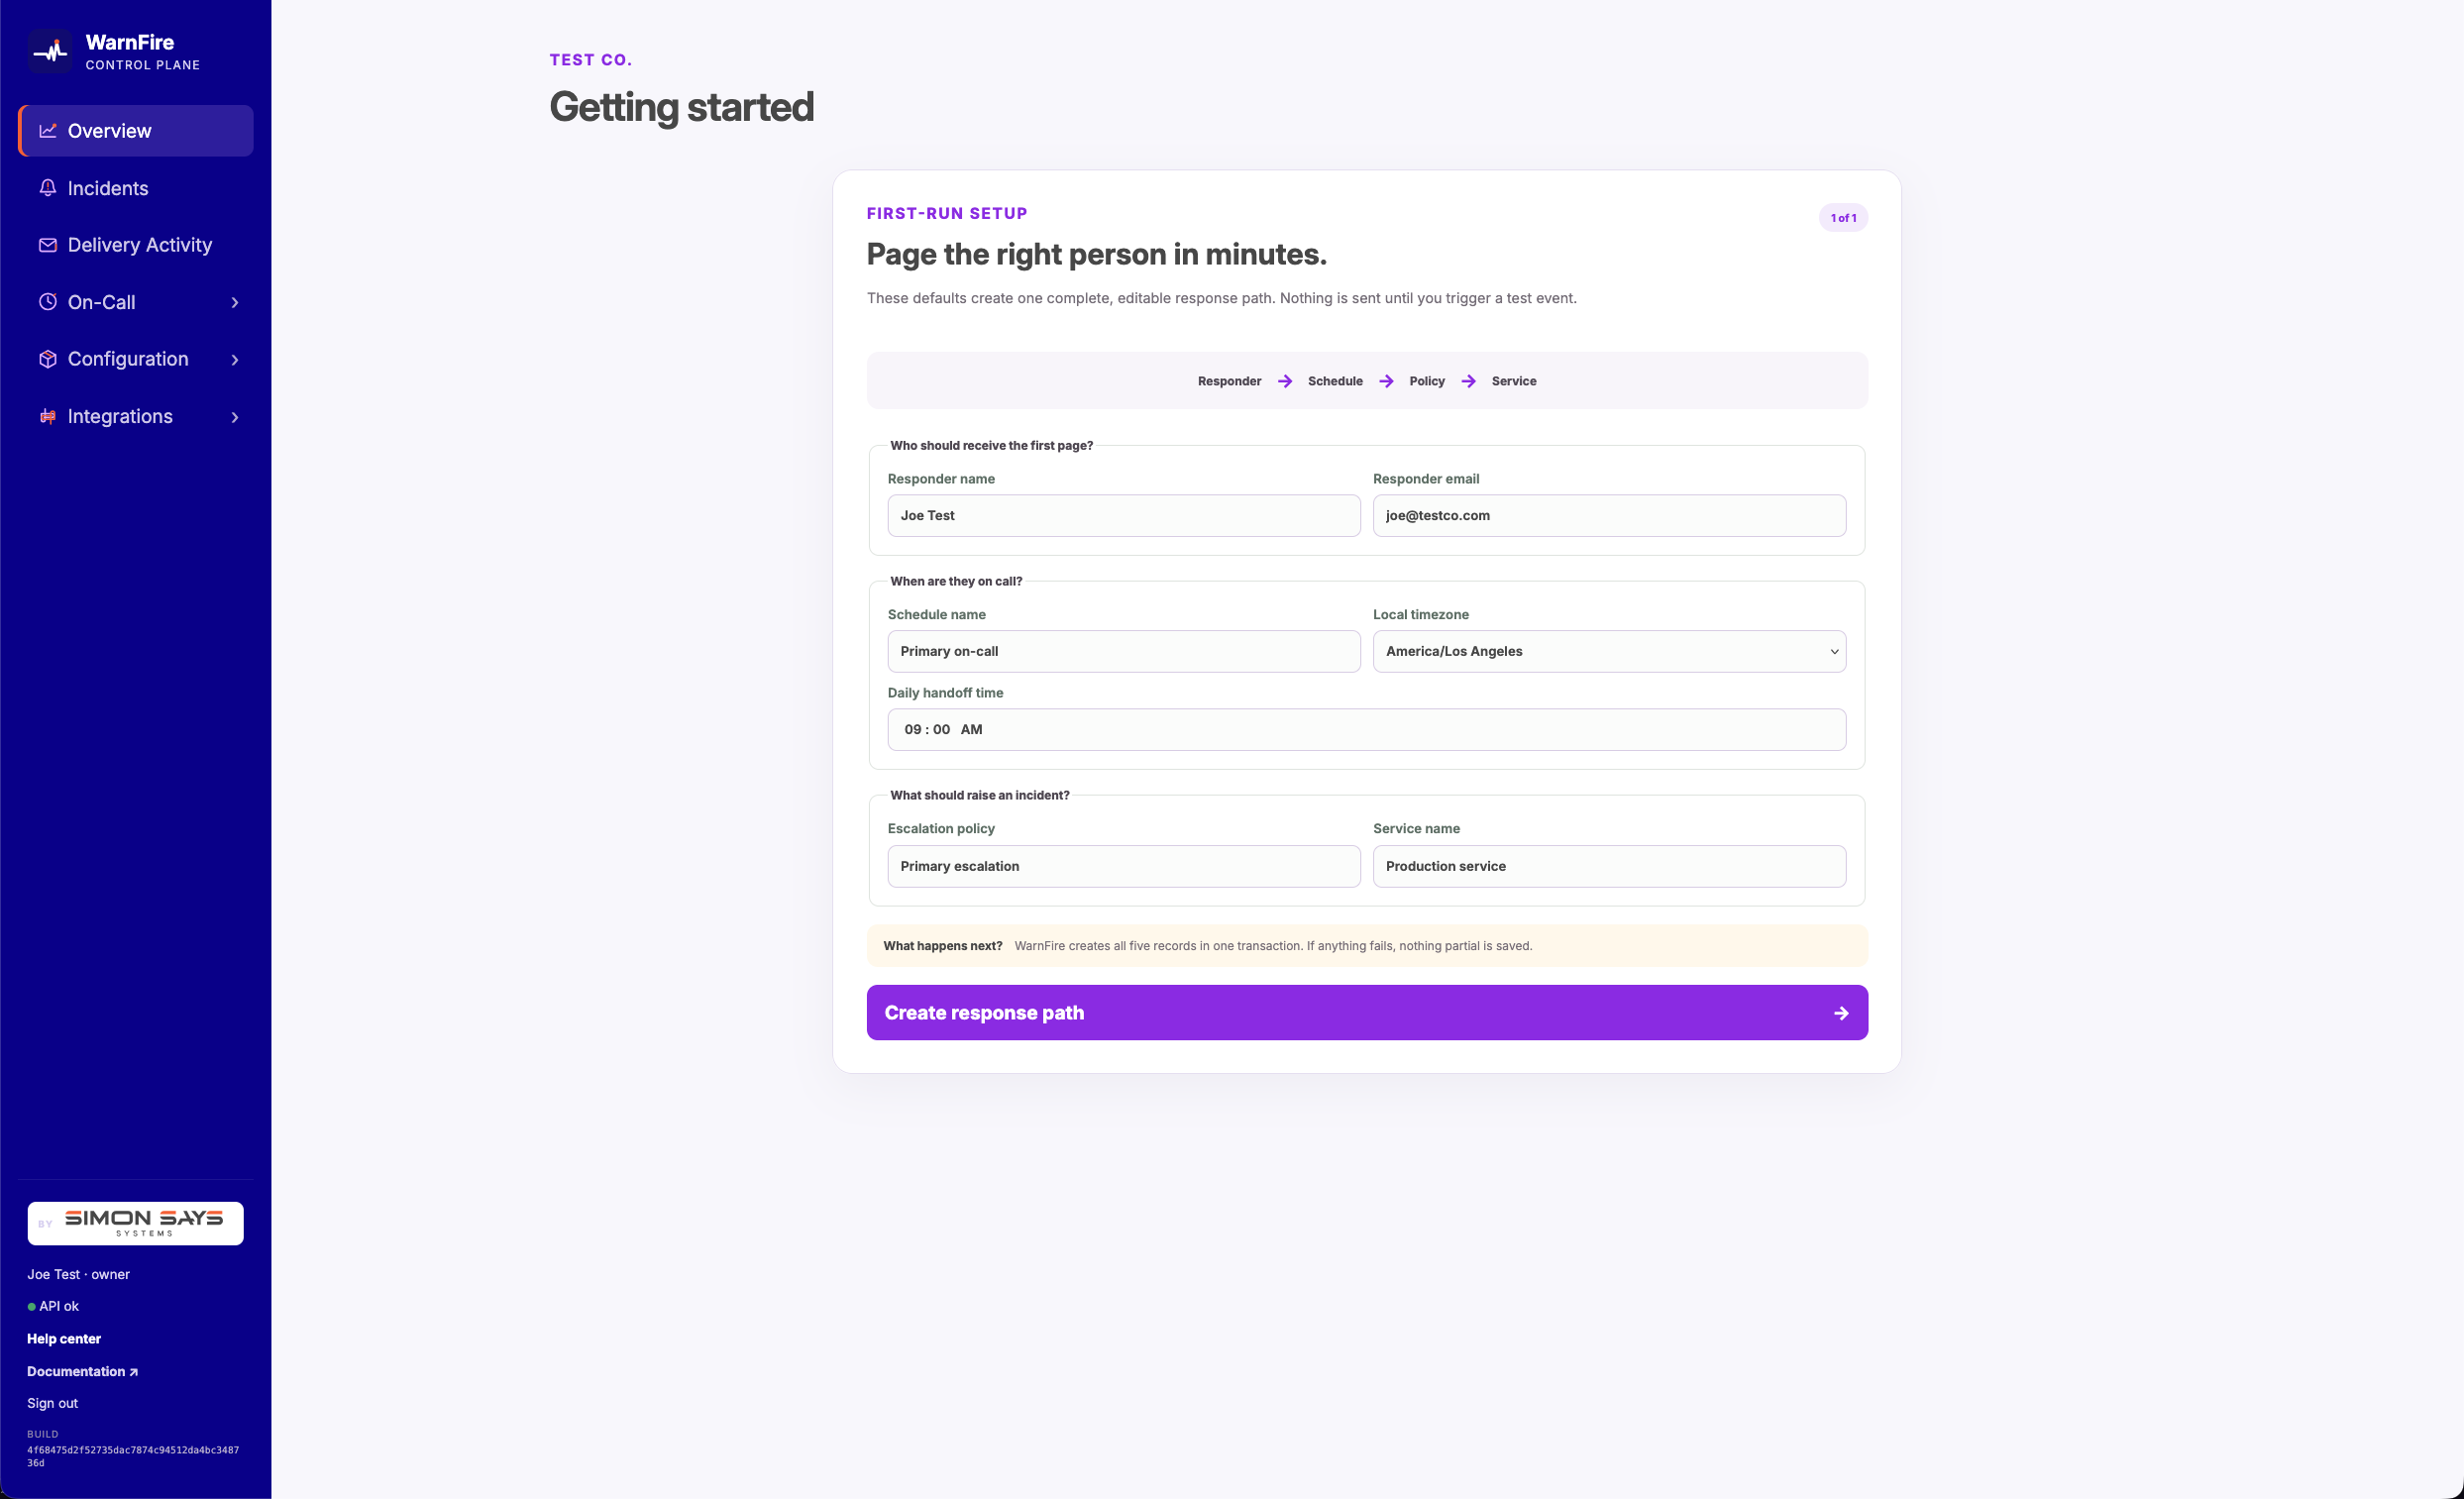
First-run setup creates the responder, schedule, escalation policy, and service together.
The success screen says Your first paging path is live and lists the new integration key. If the form remains open or shows an error, correct the highlighted field and submit it again; do not continue without the success screen.
Copy your integration key
When setup finishes, WarnFire shows you an integration key. It is the service credential that your monitoring system sends with an Events API alarm. The key authenticates the sender and tells WarnFire which service—and therefore which escalation policy—should receive the alarm.
A complete live key begins with wf_live_. It goes in the request’s
integration_key field. The validation tenant created the complete key below;
it was revoked after the documentation capture and cannot authenticate:
wf_live_NmG54bE2EM7bA_DsKVW9hc4LGFLUFWZERZGUWrDynt4
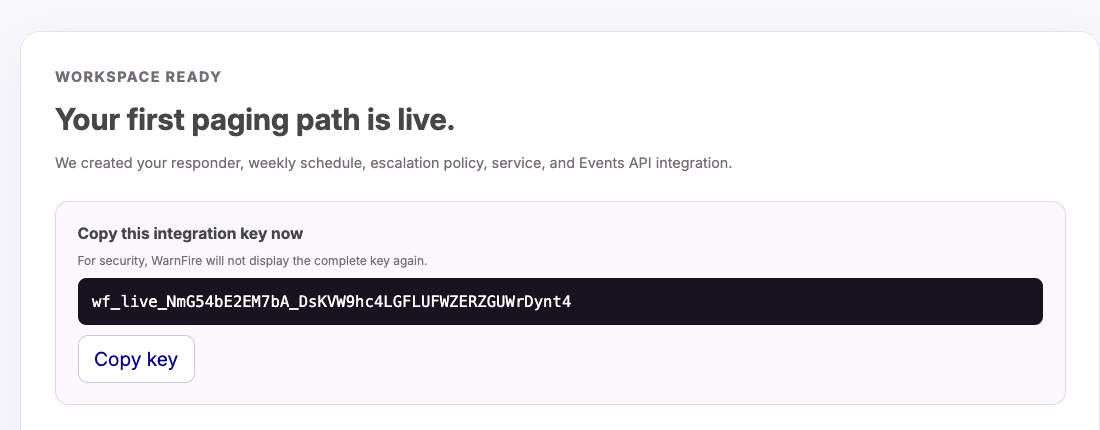
The complete integration key appears in the dark field. Select the image to open it full size.
Copy it now. For safety, WarnFire shows a key only once. If you lose it, create a replacement under Configuration → Services .
Treat the key like a password: store it somewhere safe and never paste it into chat messages. Put it in a URL only when a documented provider adapter requires the dedicated URL-key format; in that case, protect the entire URL as a secret.
Send a test event
On the same screen, press Send test event.
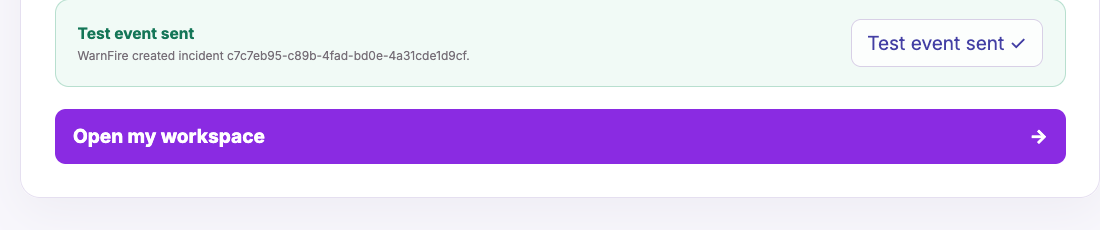
After the test is accepted, WarnFire displays the created incident identifier.
Within a few seconds you should see a new incident appear in your workspace — and the on-call responder gets paged, exactly as they would for a real problem.
A test event follows the same ingest and escalation path as a real monitoring alarm, including notifying whoever is on call.
Verify it worked
- Confirm that the setup screen says Your first paging path is live.
- Select Send test event once and wait for the incident identifier to appear on the setup screen.
- Open the workspace and confirm that the test incident appears in the incident list.
- Confirm with the named responder that the configured page arrived.
- Have that responder open the incident and acknowledge it. Confirm that the incident changes to Acknowledged and names the responder.
- Open Delivery Activity and confirm the expected channel’s strongest available result. Provider acceptance alone is not proof that a person or device received the page.
- Clean up the test by sending a matching
resolveevent with the samededup_key, or use Force resolve in the web console and record a reason.
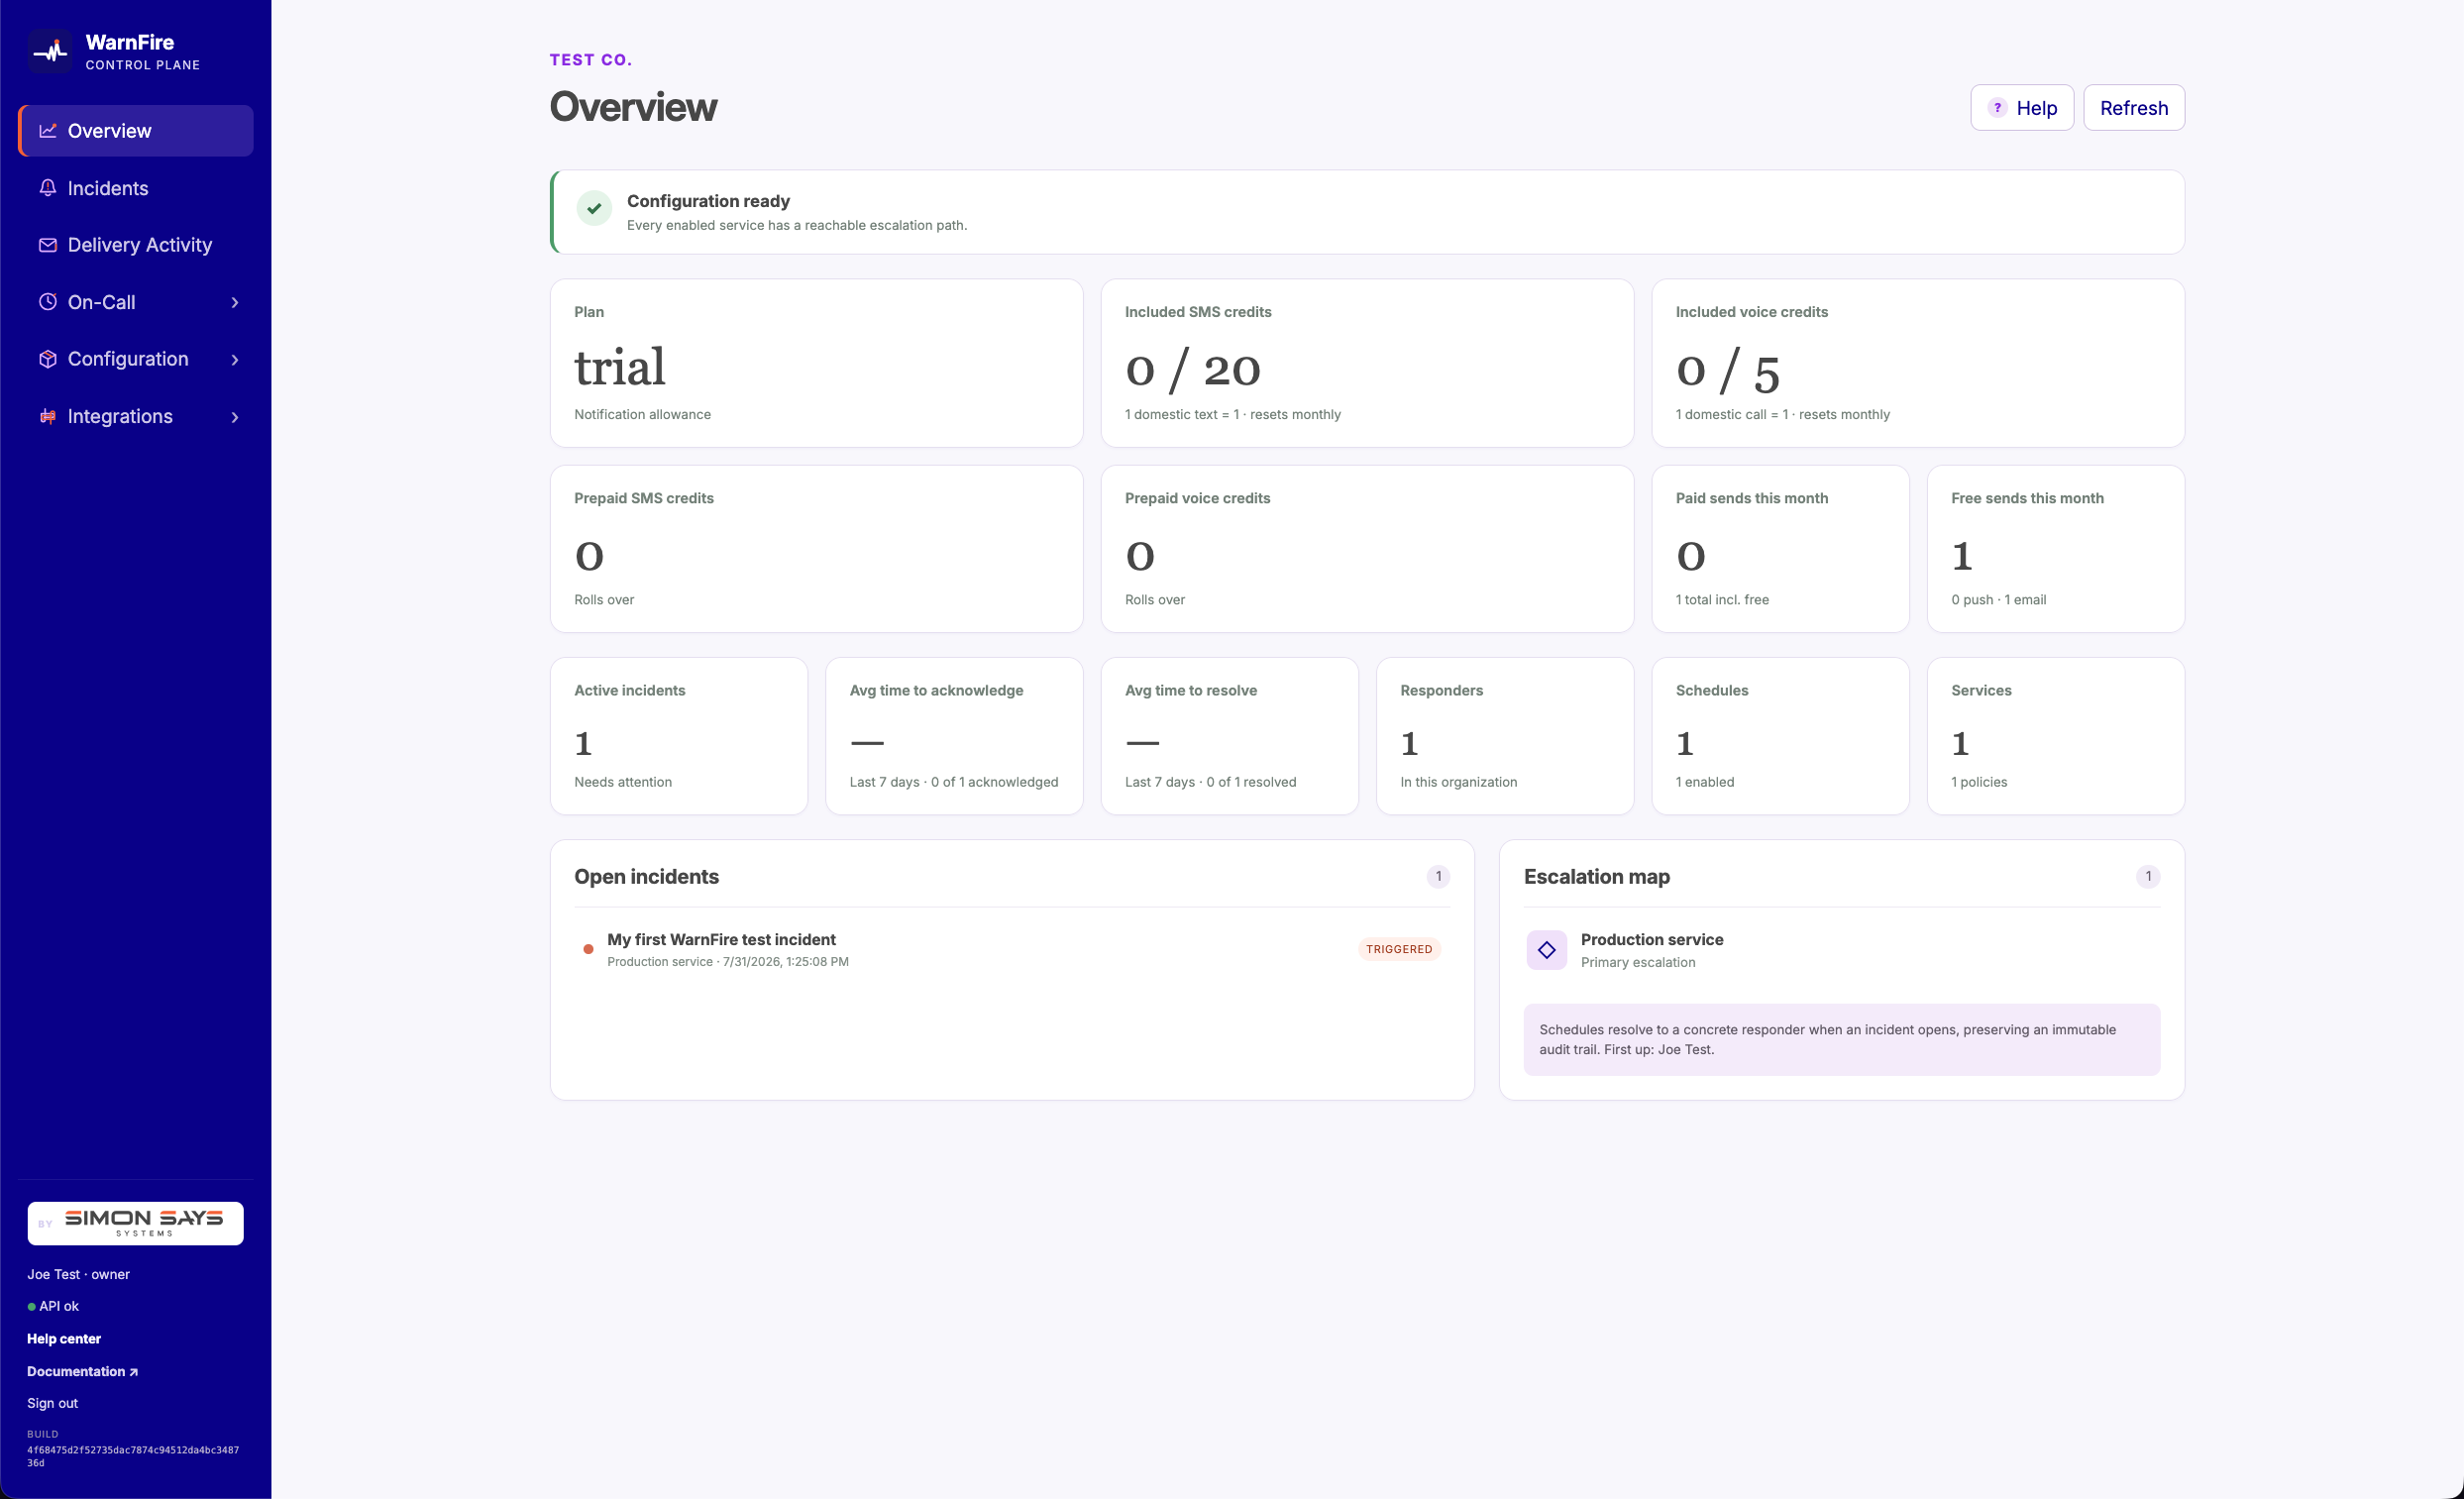
Configuration ready confirms that every enabled service has a reachable escalation path. The open incident confirms that WarnFire accepted the test event.
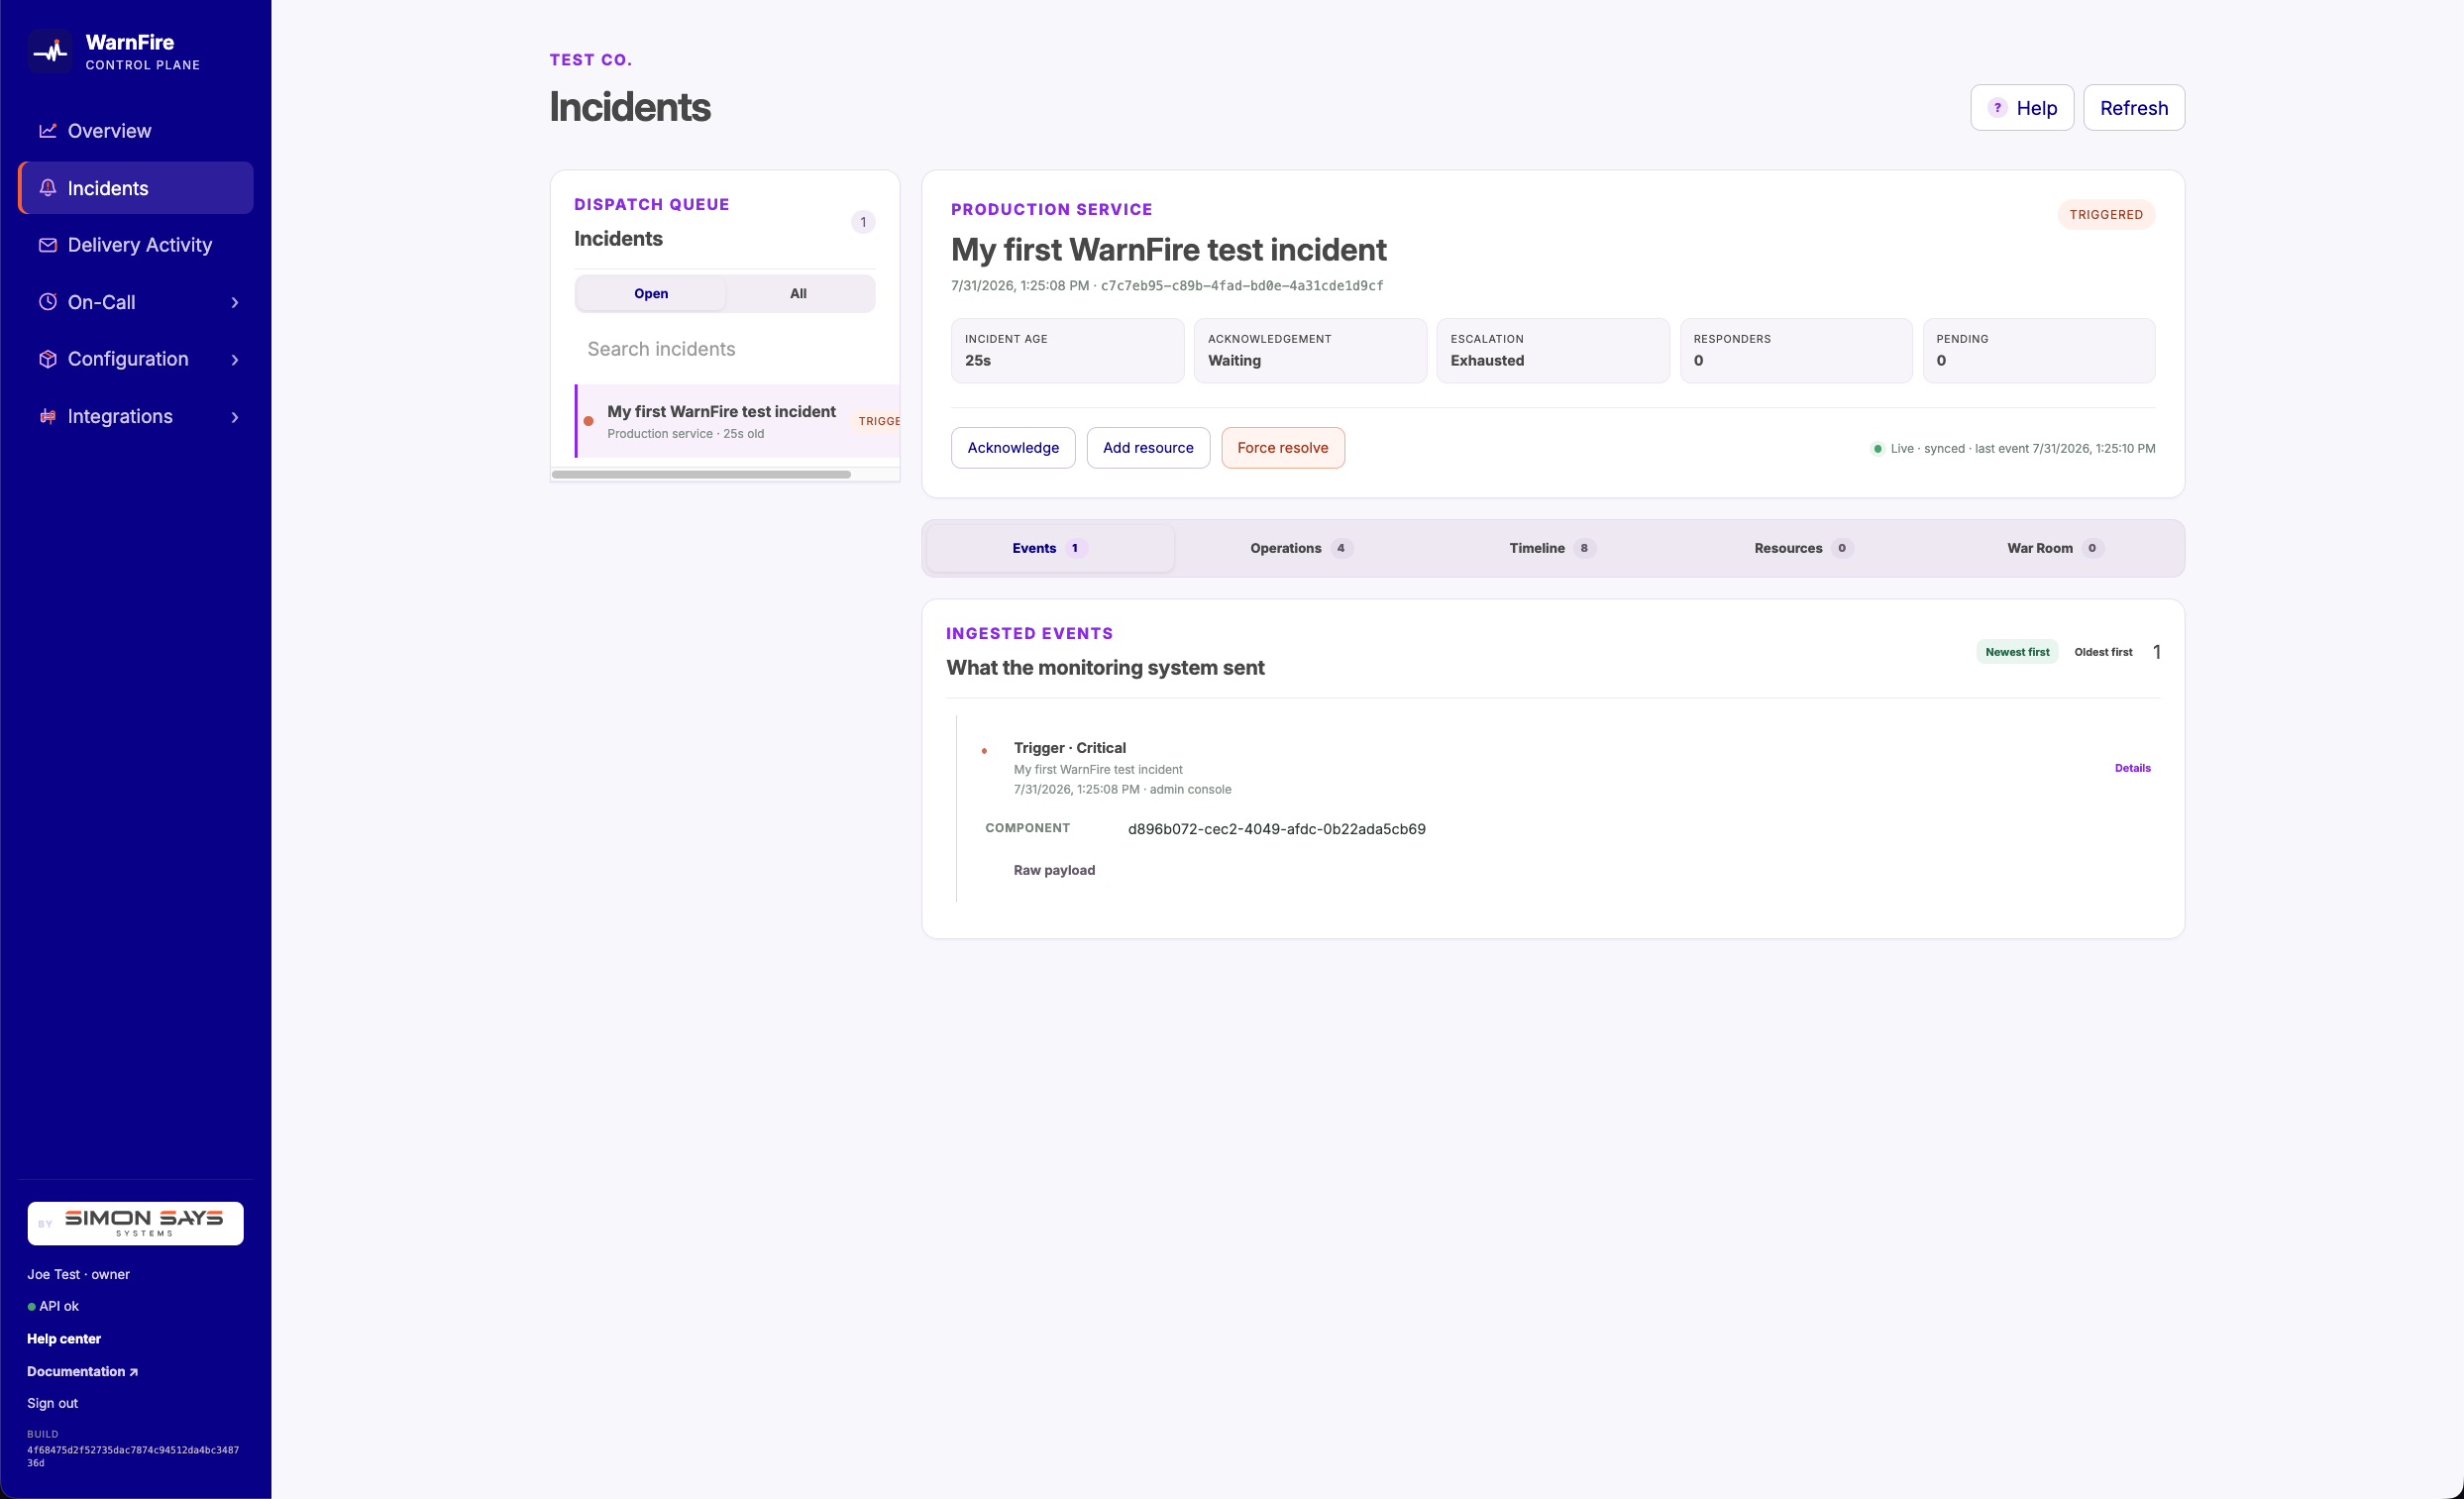
The incident page confirms that WarnFire ingested the trigger. This capture stops before response validation: nobody acknowledged, so the escalation ran to exhaustion. Do not treat this state as a completed end-to-end test.
Do not connect a production monitoring source until the test incident appears and the intended responder receives the page.
If the incident appears but the responder does not receive a page, inspect Delivery Activity before changing the escalation policy. If no incident appears, confirm the service is enabled and repeat the readiness test. A test that uses SMS or voice consumes the applicable allowance or prepaid credits.
Next steps
- Add the rest of your team .
- Put the WarnFire app on your phone .
- Connect your monitoring system with a provider-specific webhook adapter or the Events API . For Prometheus, use the Alertmanager guide .